Accessing your dedicated server's management panel#
To launch a reinstall of your dedicated server, you will first need to go to your dedicated server's management panel. If you don't know where to find it, you can check our documentation: Overview of my dedicated server's management panel
Choosing the OS (operating system) to install#
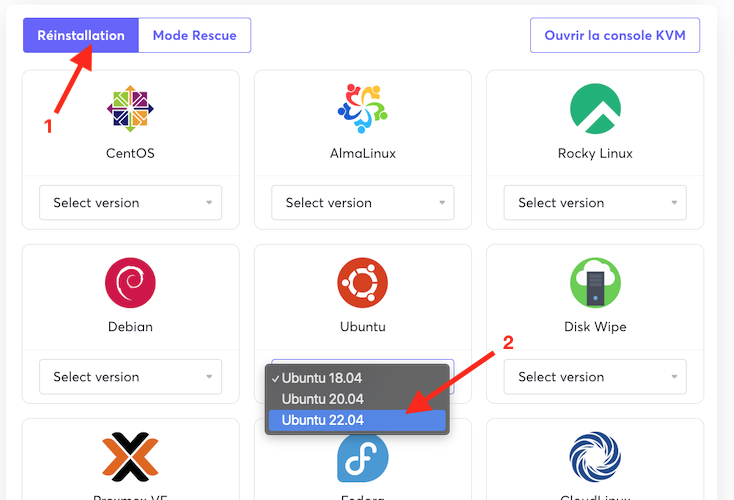
To reinstall your dedicated server, you must first select the OS (operating system) you want to install on that server. We offer a wide range of OSes available for automatic installation (meaning the installation, configuration, and internet connection are all carried out automatically, with no action required on your part).
All you need to do is click on the OS of your choice in the catalogue shown on your screen, then choose the version of the OS you want to install. As a general rule, we recommend installing the most recent version available (in most cases, this is the one with the highest number, located at the bottom of the list)
Choosing the installation settings#
Before launching the reinstall, you will need to check a few very simple settings:
- The Hostname you want to use in the OS. As a general rule, you can leave the default name entered in this field, but if you prefer, you can also replace it with a name of your choice. In some situations (for example, to send emails from the server), you will need to enter a specific value (such as a domain name).
- The server's new root password: This will be the new root password you will need to use to log in as "root" (or "Administrator" on Windows) once the server has been reinstalled. You can keep the automatically generated password, or enter your own custom password. In either case, make sure to note it down before launching the reinstall, as without this password you will not be able to log in to the server after the reinstall.
- Disk layout (optional): In some situations, your server may support several partition types (RAID 5, RAID 10, etc). In the vast majority of cases, we recommend leaving this option on the default value: "Automatic Partitioning".
(Optional) Using SSH keys#
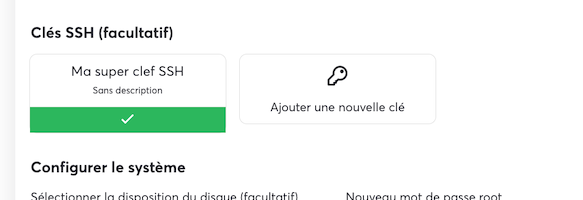
If you are comfortable using SSH keys and prefer this login method over a root password, you can do so when reinstalling your dedicated server.
All you need to do is add your new SSH key (or select existing SSH keys), which will automatically be configured on the server.
Launching the server reinstall#
When you are ready to launch the server reinstall, simply click on the "" button and confirm the confirmation window that opens.
How do I follow my reinstall?#
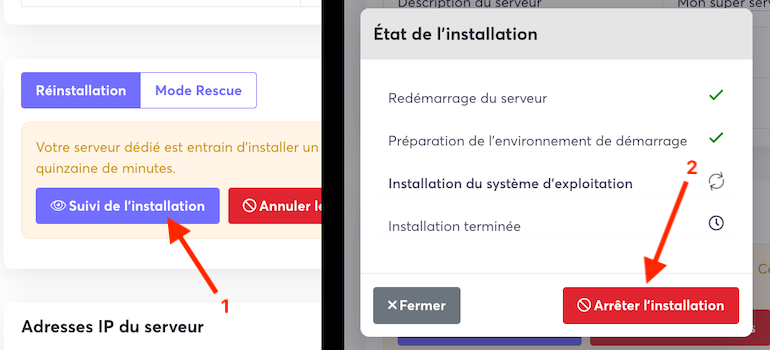
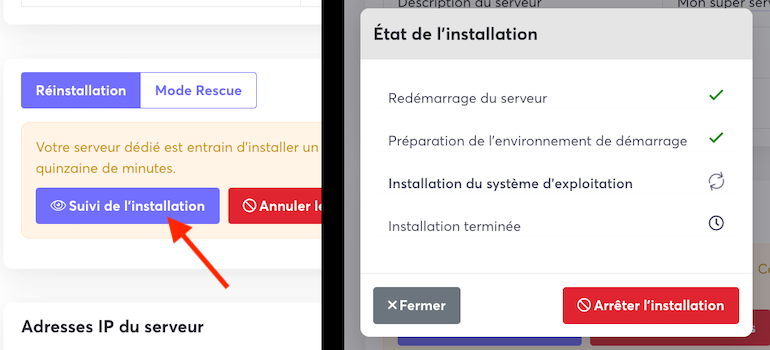
Reinstalling your dedicated server takes a little time (usually about a quarter of an hour). If you wish, you can follow the status of the reinstall by clicking on the "Installation progress" button that appears in your client area.
Stopping a reinstall in progress#
Should it ever be necessary, we provide a button that lets you stop the reinstall process of your dedicated server. Please note, however, that this button only stops the process in progress. It does not allow you to "go back", and therefore cannot restore data that has already been erased from the server. In the vast majority of cases, stopping the reinstall means the server will no longer be usable until you launch a new reinstall.